EGR COOLER > REMOVAL |
| 1. REMOVE WINDSHIELD WIPER MOTOR AND LINK ASSEMBLY |
Remove the windshield wiper motor and link assembly (Click here).
| 2. REMOVE COWL BODY MOUNTING REINFORCEMENT LH (for LHD) |
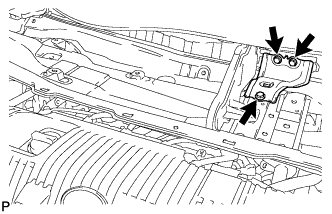 |
Remove the 3 bolts and cowl body mounting reinforcement LH.
| 3. REMOVE COWL BODY MOUNTING REINFORCEMENT LH (for RHD) |
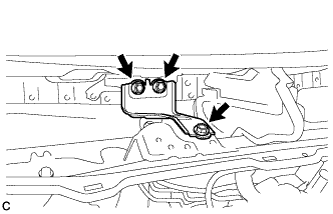 |
Remove the 3 bolts and cowl body mounting reinforcement LH.
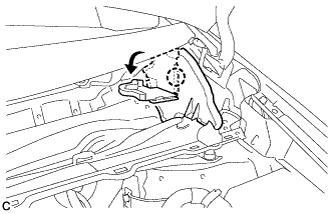
| 4. REMOVE OUTER COWL TOP PANEL SUB-ASSEMBLY (for LHD) |
 |
Disengage the clamp and separate the wire harness.
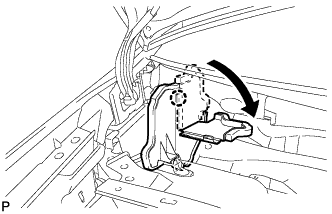 |
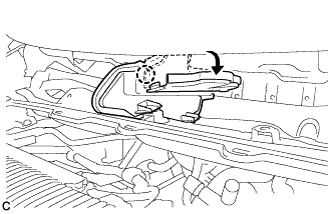
Disengage the claw and bend the No. 1 heater air duct splash shield seal.
 |
Disengage the claw and bend the water guard plate RH.
 |
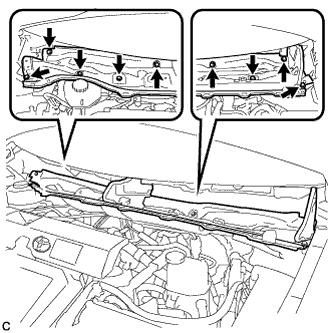
Remove the 9 bolts and outer cowl top panel sub-assembly.
| 5. REMOVE OUTER COWL TOP PANEL SUB-ASSEMBLY (for RHD) |
 |
Disengage the clamp and separate the wire harness from the outer cowl top panel sub-assembly.
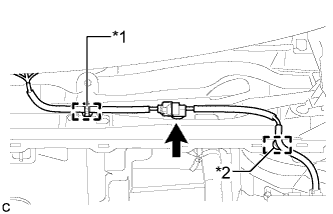 |
Disengage the clamp*1 and disconnect the connector (w/ Windshield Deicer).
Disengage the clamp*2 and separate the wire harness from the outer cowl top panel sub-assembly.
 |
Disengage the claw and bend the No. 1 heater air duct splash shield seal.
 |
Disengage the claw and bend the water guard plate RH.
 |
Remove the 9 bolts and outer cowl top panel sub-assembly.
| 6. DRAIN COOLANT (for Engine) |
Loosen the radiator drain cock plug and drain the coolant.
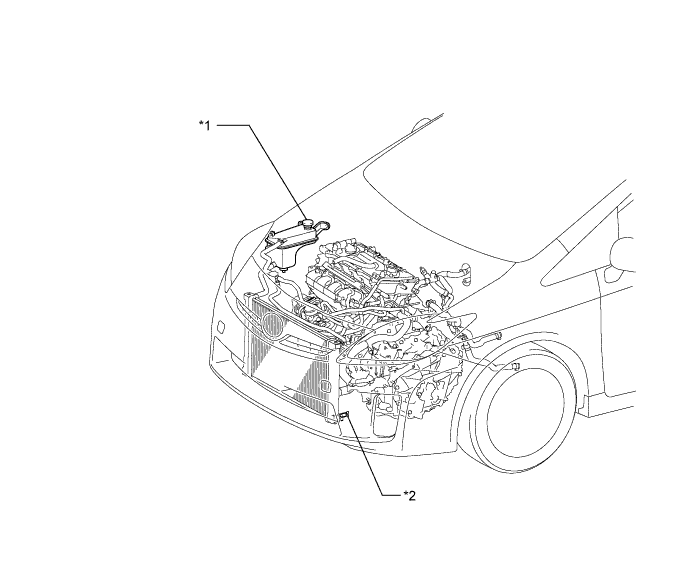
| *1 | Reservoir Tank Cap | *2 | Radiator Drain Cock Plug |
| 7. REMOVE NO. 2 CYLINDER HEAD COVER |
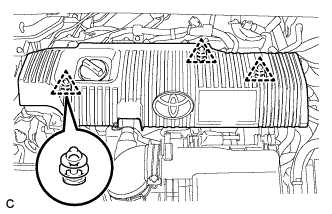 |
Remove the 3 clips and No. 2 cylinder head cover.
| 8. REMOVE AIR CLEANER CAP SUB-ASSEMBLY |
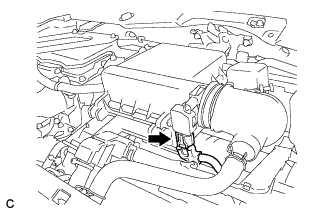 |
Disconnect the connector.
 |
Loosen the hose clamp and disconnect the air cleaner hose assembly.
Remove the 2 clamps and air cleaner cap sub-assembly.
| 9. REMOVE INLET AIR CLEANER ASSEMBLY |
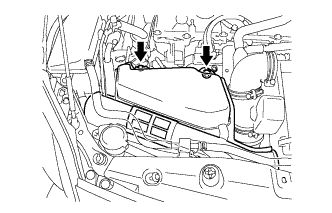 |
Remove the 2 bolts and inlet air cleaner assembly.
| 10. REMOVE AIR CLEANER CASE |
Remove the air cleaner filter element sub-assembly.
 |
Separate the hose from the 3 clamps.
Remove the 3 bolts and air cleaner case.
| 11. REMOVE EGR PIPE ASSEMBLY |
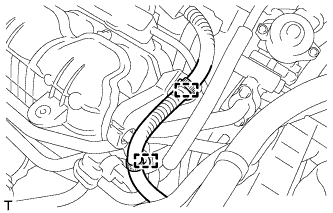 |
Disconnect the 2 wire harness clamps.
 |
Remove the bolt and wire harness support.
 |
Remove the 4 bolts, EGR pipe assembly and 2 gaskets.
| 12. REMOVE EGR COOLER SUB-ASSEMBLY |
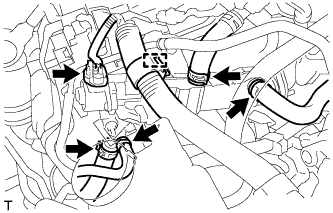 |
Disconnect the connector, wire harness clamp and 4 water hoses.
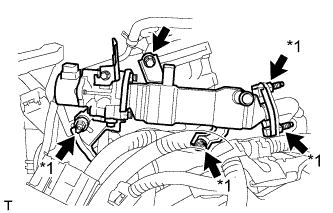 |
Remove the 4 nuts and bolt.
| *1 | Stud Bolt and Nut |
Using an E8 "TORX" wrench, remove the 4 stud bolts and EGR valve with cooler assembly.
Remove the gasket.
 |
Remove the 2 nuts, EGR cooler sub-assembly and gasket.
