INSTRUMENT PANEL SPEAKER > REMOVAL |
| 1. REMOVE FRONT PILLAR GARNISH |
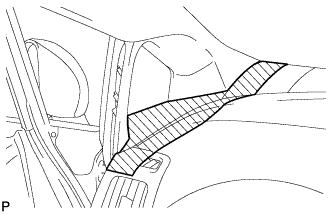 |
When removing the front pillar garnish LH, cover the shaded part in the illustration with a piece of cloth so that the interior parts will not be damaged.
 |
Pull the upper part of the garnish toward the inside of the cabin and disengage the 2 clips.
| *1 | Front Pillar Garnish Clip |
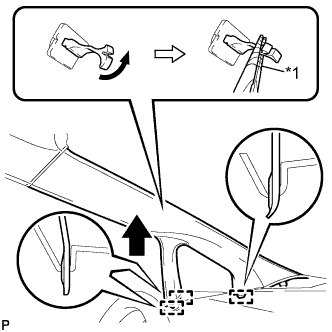 |
Turn the end of the front pillar garnish clip 90° with needle-nosed pliers and remove it from the front pillar garnish LH.
| *1 | Protective Tape |
Disengage the 3 guides.
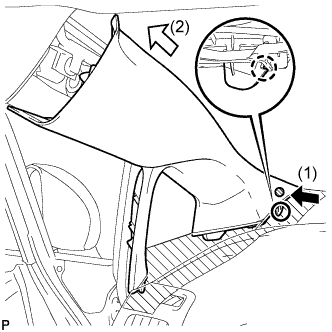 |
Disengage the claw while pressing the shaded part in the illustration in the direction indicated by the arrow (1).
Remove the front pillar garnish LH by pulling it in the direction indicated by the arrow (2) in the illustration.
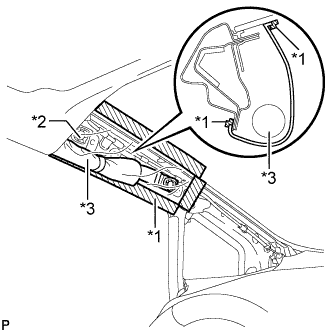 |
Protect the curtain shield airbag assembly.
| *1 | Adhesive Tape |
| *2 | Protective Cover |
| *3 | Curtain Shield Airbag Assembly |
Cover the airbag with a cloth or piece of nylon and secure the ends of the cover with tape as shown in the illustration.
| 2. REMOVE FRONT PILLAR GARNISH CORNER PIECE |
 |
Disengage the 3 claws and front pillar garnish corner piece LH as shown in the illustration.
| 3. REMOVE NO. 1 INSTRUMENT PANEL SPEAKER PANEL SUB-ASSEMBLY |
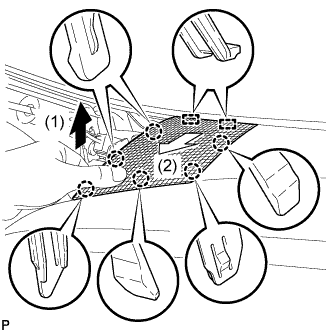 |
Pull the No. 1 instrument panel speaker panel sub-assembly in the direction indicated by the arrow to disengage the 6 claws and 2 guides, and remove the No. 1 instrument panel speaker panel sub-assembly.
| 4. REMOVE FRONT NO. 2 SPEAKER ASSEMBLY |
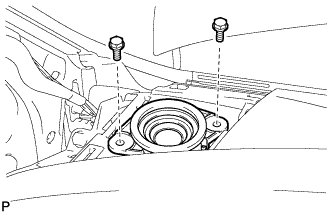 |
Remove the 2 bolts.
Disconnect the connector and remove the front No. 2 speaker assembly.
