AIR CONDITIONING AMPLIFIER > REMOVAL |
| 1. PRECAUTION (w/ Navigation System for HDD) |
| 2. REMOVE REAR NO. 2 FLOOR BOARD |
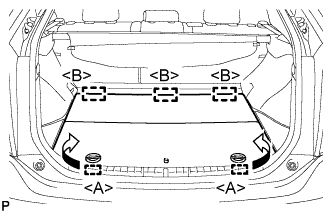 |
Disengage the 2 guides <A> as shown in the illustration.
Disengage the 3 guides <B> and remove the rear No. 2 floor board.
| 3. REMOVE REAR DECK FLOOR BOX |
Remove the rear deck floor box.
| 4. REMOVE REAR NO. 3 FLOOR BOARD |
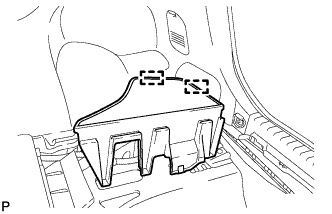 |
Disengage the 2 guides and remove the rear No. 3 floor board.
| 5. DISCONNECT CABLE FROM NEGATIVE BATTERY TERMINAL |
| 6. REMOVE FRONT NO. 1 CONSOLE BOX INSERT |
 |
Pull the front No. 1 console box insert in the direction indicated by the arrow to disengage the 4 claws and guide, and remove the front No. 1 console box insert.
| 7. REMOVE AIR CONDITIONING AMPLIFIER ASSEMBLY |
 |
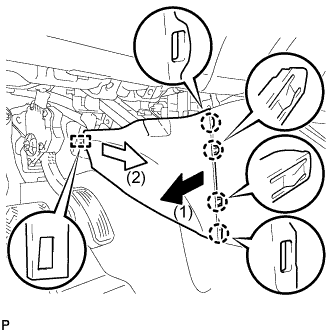
Disconnect each connector and remove the screw.
 |
Disengage the guide as shown in the illustration.
 |
Disengage the guide and remove the air conditioning amplifier assembly as shown in the illustration.
