OIL PUMP > REMOVAL |
| 1. REMOVE ENGINE ASSEMBLY WITH TRANSAXLE |
| 2. INSTALL ENGINE ON ENGINE STAND |
Install the engine onto an engine stand with the bolts.
| 3. REMOVE ENGINE HANGERS |
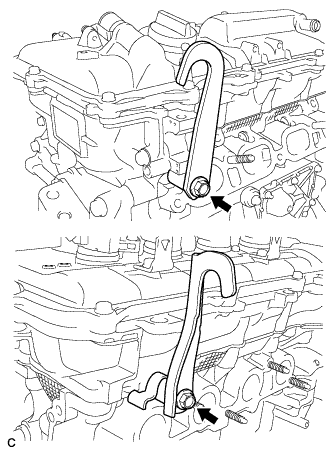 |
Remove the 2 bolts and 2 engine hangers.
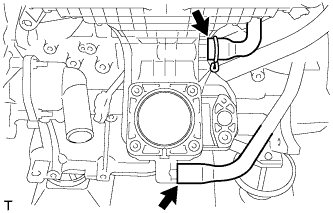
| 4. REMOVE THROTTLE BODY ASSEMBLY |
 |
Disconnect the throttle body connector and the 2 water by-pass hoses.
Remove the 2 bolts, 2 nuts and throttle body assembly.
 |
Remove the gasket from the intake manifold.
| 5. REMOVE ENGINE OIL LEVEL DIPSTICK GUIDE |
Remove the engine oil level dipstick.
 |
Remove the 2 bolts, clamp and engine oil level dipstick guide.
Remove the O-ring from the engine oil level dipstick guide.
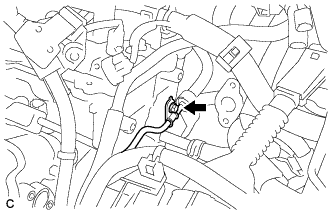
| 6. REMOVE EGR PIPE ASSEMBLY |
 |
Disconnect the 2 wire harness clamps.
 |
Remove the bolt and wire harness support.
 |
Remove the 4 bolts, EGR pipe assembly and 2 gaskets.
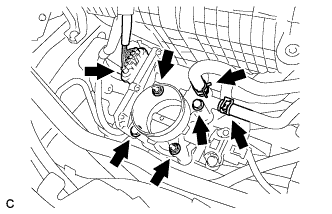
| 7. REMOVE EGR VALVE ASSEMBLY |
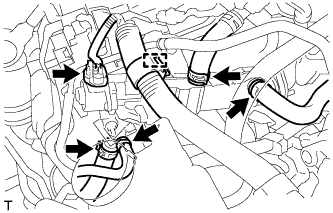 |
Disconnect the connector, wire harness clamp and 4 water hoses.
 |
Remove the 4 nuts and bolt.
| *1 | Stud Bolt and Nut |
Using an E8 "TORX" wrench, remove the 4 stud bolts and EGR valve with cooler assembly.
Remove the gasket.
 |
Remove the 2 nuts, EGR valve assembly and gasket.
| 8. REMOVE EGR COOLER SUB-ASSEMBLY |
|
Disconnect the connector, wire harness clamp and 4 water hoses.
|
Remove the 4 nuts and bolt.
| *1 | Stud Bolt and Nut |
Using an E8 "TORX" wrench, remove the 4 stud bolts and EGR valve with cooler assembly.
Remove the gasket.
 |
Remove the 2 nuts, EGR cooler sub-assembly and gasket.
| 9. REMOVE INTAKE MANIFOLD |
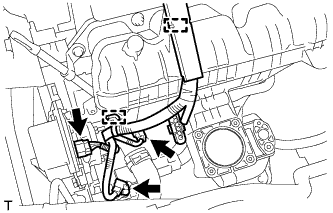 |
Disconnect the 3 connectors and 2 wire harness clamps.
Remove the engine oil level dipstick guide sub-assembly.
 |
Disconnect the wire harness clamp, and then remove the 2 bolts and engine oil level dipstick guide sub-assembly.
Remove the O-ring from the engine oil level dipstick guide sub-assembly.
 |
Disconnect the fuel vapor feed hose and ventilation hose.
 |
Remove the 2 bolts, 2 nuts and intake manifold.
Remove the No. 1 intake manifold to head gasket.
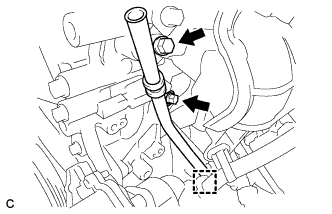
| 10. REMOVE FUEL VAPOR FEED PIPE |
 |
Remove the bolt and fuel vapor feed pipe.
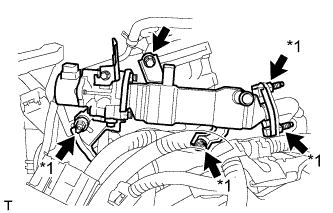
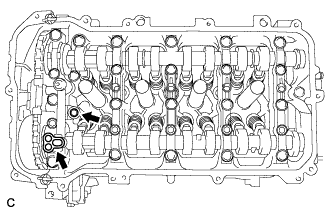
| 11. REMOVE FUEL DELIVERY PIPE SUB-ASSEMBLY |
 |
Remove the bolt.
 |
Remove the 2 bolts and the fuel delivery pipe sub-assembly.
| 12. REMOVE NO. 1 DELIVERY PIPE SPACER |
 |
Remove the 2 delivery pipe spacers from the cylinder head.
| 13. REMOVE FUEL INJECTOR ASSEMBLY |
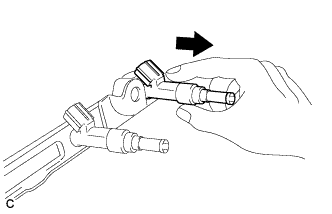 |
Pull the 4 fuel injector assemblies out of the fuel delivery pipe sub-assembly.
Remove the O-ring from each fuel injector assembly.
 |
For reinstallation, attach a tag or label to each injector shaft.
 |
Remove the 4 injector vibration insulators.
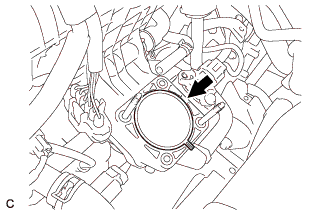
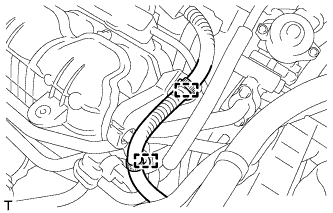
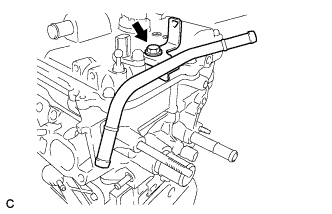
| 14. REMOVE WATER INLET WITH THERMOSTAT SUB-ASSEMBLY |
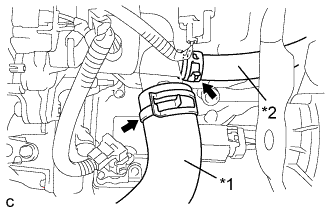 |
Disconnect the No. 2 radiator hose and No. 3 water by-pass hose.
| *1 | No. 2 Radiator Hose |
| *2 | No. 3 Water By-pass Hose |
 |
Remove the 2 nuts, bolt and water inlet with thermostat sub-assembly.
 |
Remove the gasket from the water inlet with thermostat sub-assembly.
| 15. REMOVE IGNITION COIL ASSEMBLY |
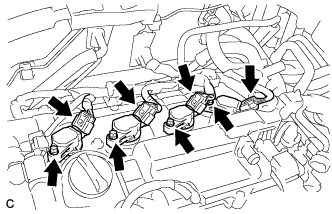 |
Disconnect the 4 ignition coil connectors.
Remove the 4 bolts and 4 ignition coils.
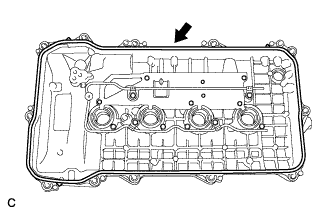
| 16. REMOVE CYLINDER HEAD COVER SUB-ASSEMBLY |
 |
Remove the 13 bolts, seal washer and cylinder head cover.
 |
Remove the 2 gaskets from the camshaft bearing cap.
| 17. REMOVE CYLINDER HEAD COVER GASKET |
 |
Remove the cylinder head cover gasket.
| 18. REMOVE SPARK PLUG TUBE GASKET |
 |
Pry up the 4 claws of the ventilation baffle plate.
Remove the 4 gaskets from the cylinder head cover.
| 19. SET NO. 1 CYLINDER TO TDC / COMPRESSION |
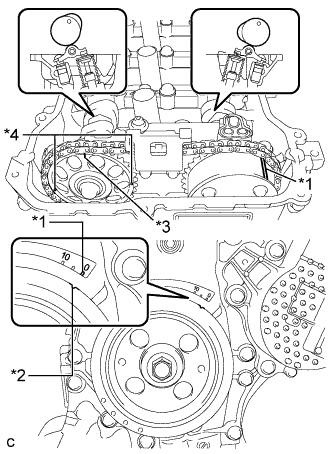 |
Turn the crankshaft pulley until its notch and timing mark "0" of the timing chain cover are aligned.
| *1 | Timing Mark |
| *2 | Timing Notch |
| *3 | Timing Mark (Rectangle) |
| *4 | Mark (Circle) |
Check that the timing marks on both the camshaft timing sprocket and the camshaft timing gear are facing upward as shown in the illustration.
If not, turn the crankshaft 1 complete revolution (360°) and align the marks as above.
| 20. REMOVE CRANKSHAFT PULLEY |
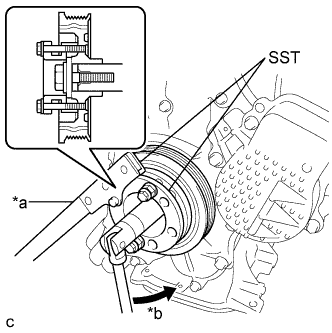 |
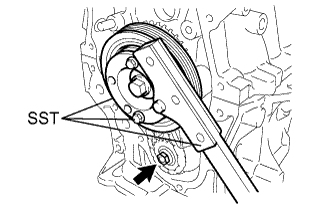
Using SST, hold the pulley in place and loosen the pulley bolt.
| *a | Hold |
| *b | Turn |
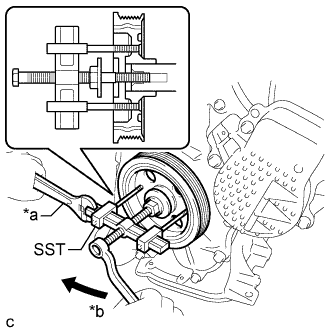 |
Using SST, remove the crankshaft pulley and pulley bolt.
| *a | Hold |
| *b | Turn |
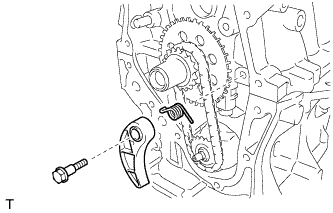
| 21. REMOVE NO. 1 CHAIN TENSIONER ASSEMBLY |
 |
Remove the 2 nuts, bracket, chain tensioner and gasket.
| 22. REMOVE TIMING CHAIN COVER SUB-ASSEMBLY |
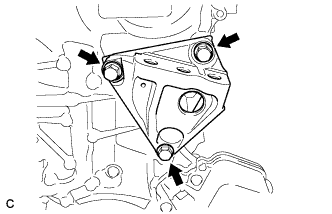 |
Remove the 3 bolts and engine mounting bracket RH.
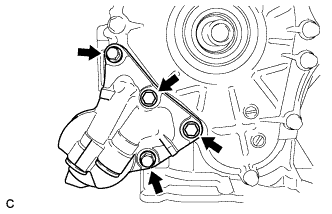 |
Remove the 4 bolts and oil filter bracket.
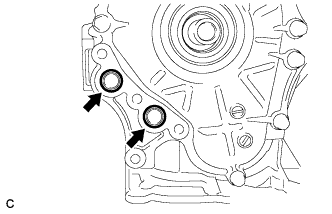 |
Remove the 2 O-rings.
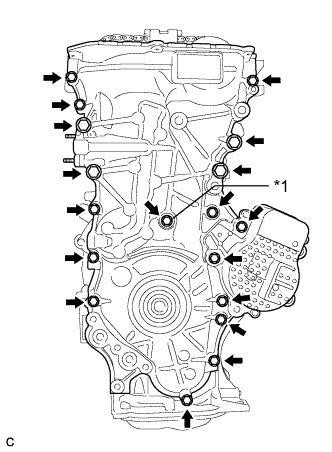 |
Remove the 18 bolts and seal washer.
| *1 | Seal Washer |
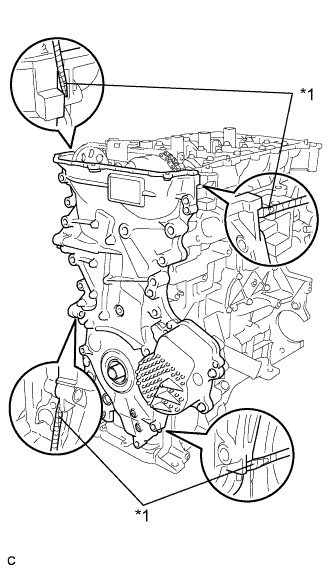 |
Remove the timing chain cover by prying between the timing chain cover and cylinder head or cylinder block with a screwdriver.
| *1 | Protective Tape |
 |
Remove the 3 O-rings.
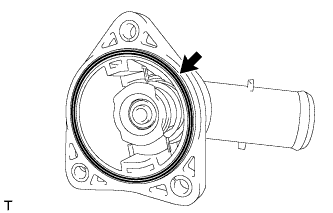
| 23. REMOVE TIMING CHAIN COVER OIL SEAL |
Place the timing chain cover on wooden blocks.
 |
Using a screwdriver, pry out the oil seal.
| *1 | Protective Tape |
| *2 | Wooden Block |
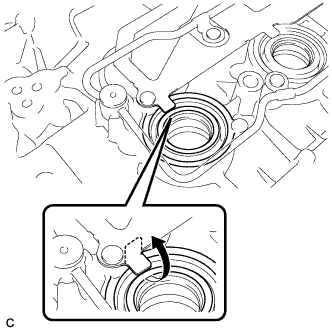
| 24. REMOVE CHAIN TENSIONER SLIPPER |
 |
Remove the chain tensioner slipper from the cylinder block.
| 25. REMOVE NO. 1 CHAIN VIBRATION DAMPER |
 |
Remove the 2 bolts and chain vibration damper.
| 26. REMOVE NO. 2 CHAIN VIBRATION DAMPER |
 |
Remove the 2 bolts and No. 2 chain vibration damper.
| 27. REMOVE CHAIN SUB-ASSEMBLY |
 |
Hold the hexagonal portion of the camshaft with a wrench and turn the camshaft timing gear counterclockwise to loosen the chain between the camshaft timing gears.
With the chain loosened, release the chain from the camshaft timing gear and place it on the camshaft timing gear.
Turn the camshaft clockwise to return it to the original position and remove the chain.
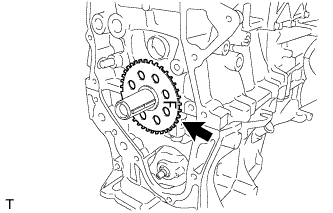
| 28. REMOVE CRANKSHAFT TIMING SPROCKET |
 |
Remove the crankshaft timing sprocket.
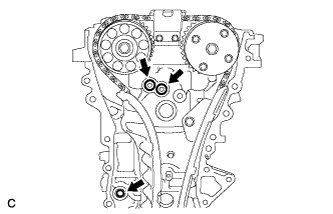
| 29. REMOVE NO. 2 CHAIN SUB-ASSEMBLY |
Temporarily tighten the crankshaft pulley and crankshaft pulley bolt.
 |
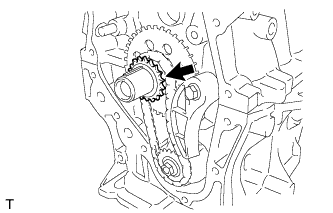
Using SST, remove the oil pump drive shaft sprocket nut while holding the crankshaft pulley.
Remove the SST, crankshaft pulley, and crankshaft pulley bolt.
 |
Remove the bolt, chain tensioner plate, and spring.
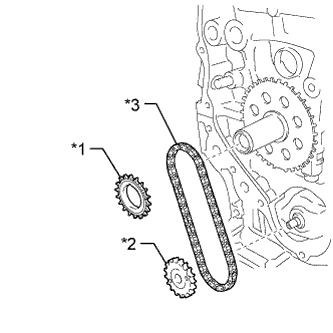 |
Remove the oil pump drive gear, oil pump drive shaft gear, and No. 2 chain sub-assembly.
| *1 | Oil Pump Drive Gear |
| *2 | Oil Pump Drive Shaft Gear |
| *3 | No. 2 Chain Sub-assembly |
| 30. REMOVE NO. 1 CRANKSHAFT POSITION SENSOR PLATE |
 |
Remove the crankshaft position sensor plate.
| 31. REMOVE OIL PAN DRAIN PLUG |
 |
Remove the drain plug and gasket.
| 32. REMOVE NO. 2 OIL PAN SUB-ASSEMBLY |
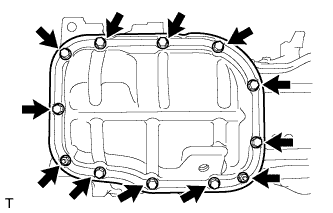 |
Remove the 10 bolts and 2 nuts.
 |
Insert the blade of oil pan seal cutter between the crankcase and oil pan. Cut through the sealer and remove the oil pan.
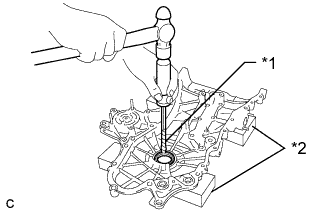
| 33. REMOVE OIL PUMP ASSEMBLY |
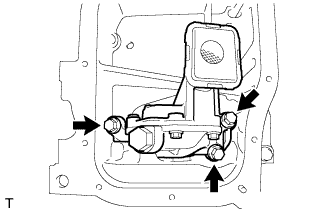 |
Remove the 3 bolts and oil pump.
