Home

Toyota Workshop

GSIC - Global Service Information Center

SPIRAL CABLE > REMOVAL

for Preparation Click here


1. REMOVE STEERING WHEEL ASSEMBLY

HINT:
Refer to the procedure up to Remove Steering Wheel Assembly (Click here).


2. REMOVE LOWER STEERING COLUMN COVER

NOTICE:
Removing the lower steering column cover in the incorrect order will cause the parts to break.


    C206253
  1. Push the right and left sides of the lower steering column cover to disengage the 4 claws.


    C206254
  1. Insert fingers into the opening of the tilt lever of the lower steering column cover to disengage the 2 claws.

    HINT:
    Spread the claws to disengage them.


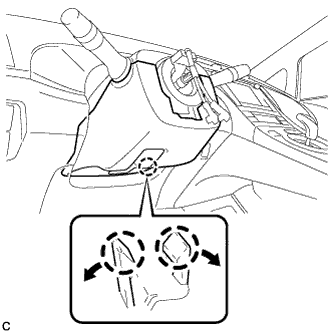
  1. Using a screwdriver, insert the tip into each service hole to disengage the 2 claws to remove the lower steering column cover as shown in the illustration.


    C206255E01


    Text in Illustration 
    *1
    Service Hole
    *2
    Protective Tape

    HINT:
    Tape the screwdriver tip before use.


3. REMOVE UPPER STEERING COLUMN COVER


    C206258
  1. Disengage the 2 claws and 2 pins to remove the upper steering column cover.


4. REMOVE SPIRAL CABLE WITH SENSOR SUB-ASSEMBLY

NOTICE:
  1. Do not replace the spiral cable with the battery connected and the power switch on (IG).
  2. Do not rotate the spiral cable with the battery connected and the power switch on (IG).
  3. Ensure that the steering wheel is installed and aligned straight when inspecting the steering sensor.
  4. Do not remove the steering sensor from the spiral cable.


    B226987E01
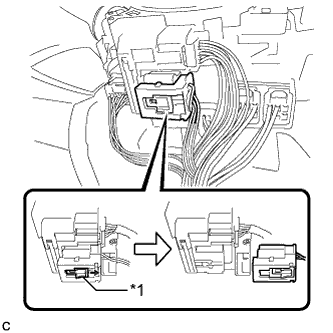
  1. Slide the slider to release the lock, and then disconnect the yellow airbag connector from the spiral cable with sensor sub-assembly.
    Text in Illustration 
    *1
    Slider

    NOTICE:
    When disconnecting any airbag connector, take care not to damage the airbag wire harness.

  1. Disconnect the other connector from the spiral cable with sensor sub-assembly.


    B232536
  1. Disengage the 3 claws to remove the spiral cable with sensor sub-assembly.